When it’s time to cut ties with a subscription on your iPhone, the process should be as smooth as butter. Whether it’s an app that’s overstayed its welcome or a service that’s no longer sparking joy, here’s how you can reclaim your digital peace and your wallet.
Instantly find unwanted subscriptions. 100% Free.


Via Settings App
Open the Settings app: Start by tapping that gear icon that’s your gateway to all things iPhone settings.
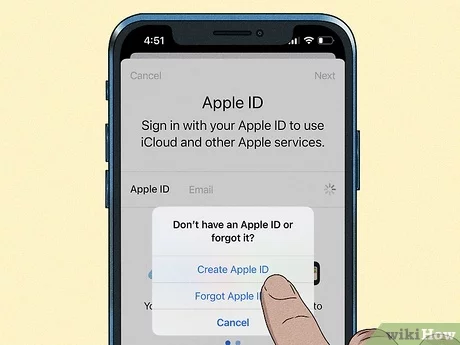
Tap on your Apple ID: At the very top, you’ll see your name and picture if you’ve added one. Give it a tap to dive into your Apple ID, iCloud, and iTunes & App Store settings.
Head over to Subscriptions: Scroll down a bit, and you’ll find “Subscriptions.” This is where all your active and past subscriptions hang out.
Choose the subscription to cancel: You’ll see a list of all subscriptions tied to your Apple ID. Tap on the one you want to part ways with.
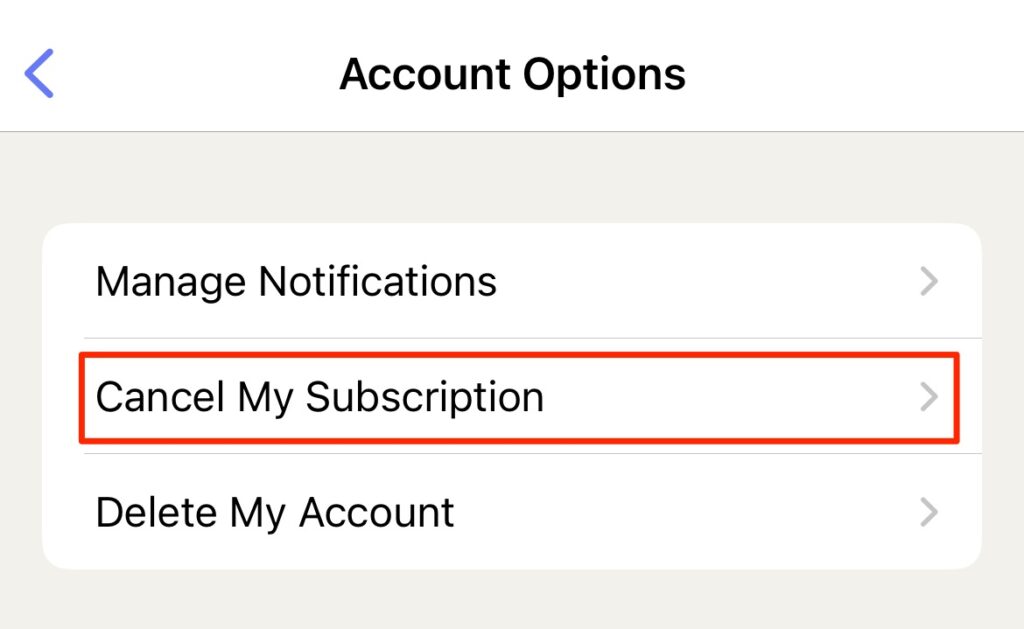
Tap ‘Cancel Subscription’: If you’re having second thoughts, this is your last chance to back out! If you’re ready, go ahead and tap. Sometimes, you might have to scroll down to find this button.
Using the App Store
Open the App Store: Find your way to the App Store, where all the magic (and financial drains) begin.
Tap on your profile icon: Look towards the top right corner, and you’ll see your profile icon or your initials if you haven’t set a picture.
Tap on ‘Subscriptions’: This will take you to a list similar to the one in Settings, showing all your subscriptions.
Select the subscription to cancel: Find the culprit and tap on it.
Tap ‘Cancel Subscription’: Just like in Settings, you’ll need to confirm your decision by tapping this option.
By following these steps, you can manage and cancel subscriptions directly from your iPhone, ensuring you only pay for what you truly use and enjoy.
Perfect, let’s delve into what happens after you tap that “Cancel Subscription” button.
Tap Cancel Subscription
Hitting “Cancel Subscription” might feel like you’re breaking up with your app, but sometimes it’s for the best. Here’s the lowdown on what goes down after you tap:
Immediate Effect?: Not quite. Tapping “Cancel” doesn’t end your subscription then and there. Instead, it stops the subscription from renewing. You’ve essentially put up a “Do Not Disturb” sign for future charges.
Access Until the End: Just because you’ve canceled doesn’t mean it’s goodbye just yet. You’ll still have access to the subscription until the current billing period wraps up. Think of it as the app’s farewell tour on your iPhone.
No More Auto-Renew: The main thing that changes is that your subscription won’t auto-renew. When the current period ends, so does your access, and the app takes its silent exit from your subscription list.
Remember, canceling a subscription doesn’t delete your account with the app or service. If it’s a service you might want to return to, your data usually hangs around, waiting for your grand comeback.
Great, let’s explore how to manage iPhone subscriptions from other devices.
Cancel Subscriptions on Other Devices
Not near your iPhone but need to cancel a subscription pronto? No worries! You can manage your iPhone subscriptions from an iPad, Mac, or even a PC. Here’s how:
On iPad
Access Settings: Tap that familiar gear icon to open Settings.
Tap Your Apple ID: Your name and photo at the top are your keys to the kingdom. Tap here to access your Apple ID settings.
Go to Subscriptions: Find “Subscriptions” in the list and tap it to see all your active and expired subscriptions.
Choose and Cancel: Select the subscription you wish to cancel and tap “Cancel Subscription.” Remember, the cancellation will take effect at the end of the current billing cycle.
On Mac
Open the App Store: Click on the App Store icon in your Dock or use Spotlight to find it.
View Your Account: Click on your name or the sign-in button at the bottom of the sidebar, then click “View Information” at the top.
Find Subscriptions: Scroll until you see “Subscriptions,” then click “Manage.”
Cancel Away: Click “Edit” next to the subscription you want to cancel, then click “Cancel Subscription.”
On PC
Open iTunes: If you don’t have iTunes, you’ll need to download it first.
Account Info: From the menu bar, choose “Account” > “View My Account,” then sign in.
Manage Subscriptions: Scroll to the “Settings” section, find “Subscriptions,” and click “Manage.”
Edit and Cancel: Click “Edit” next to the subscription you want to cancel and then “Cancel Subscription.”
Using these methods, you can manage your iPhone subscriptions from virtually any device, ensuring you’re always in control, no matter where you are.
Excellent, let’s move on to handling situations where you might not have access to your iPhone.
Cancel Subscription Without iPhone
Lost your iPhone? Decided to switch to a different brand but forgot to cancel those pesky subscriptions first? Fear not! You can still cancel your subscriptions without your iPhone. Here’s the scoop:
Use Another iOS Device: If you have an iPad or another iOS device, follow the steps outlined in the “On iPad” section above. The process is similar across all iOS devices.
On a Computer: Fire up your Mac or PC and dive into iTunes or the Music app (on macOS Catalina or later). Navigate to your account info, find the subscriptions section, and you can cancel from there.
Web Browser Magic: Some subscription services allow you to cancel directly from their website. Log into your account on the service’s website, and look for a subscriptions or billing section to make your changes.
Contact Customer Support: When all else fails, reaching out to the service’s customer support can be your golden ticket. They can guide you through the cancellation process or do it on your behalf.
Remember, just because you don’t have your iPhone doesn’t mean you’re trapped in subscription limbo. There’s always a way out!
Fantastic! Let’s tackle some common troubleshooting issues that might arise when trying to cancel subscriptions.
Troubleshooting Common Issues
Sometimes, canceling a subscription on your iPhone can feel like you’re trying to solve a puzzle that’s missing a few pieces. Here are some tips for those moments when things don’t go as planned.
Subscription Not Visible
Check All Accounts: Are you juggling multiple Apple IDs? Make sure you’re signed in with the correct Apple ID that was used to subscribe.
Family Sharing: If you’re part of a Family Sharing group, the subscription might be under another family member’s Apple ID.
Direct Subscription: Some services might have been subscribed to directly through the provider and not through the App Store. Check your email for subscription receipts or visit the service’s website.
Unable to Cancel
App-Specific Cancellations: Some apps require you to cancel subscriptions within the app itself. Dive into the app’s settings or account section to find the cancellation option.
Contact Support: If the “Cancel Subscription” button is playing hide and seek, reaching out to Apple Support or the service’s customer support can help clear the hurdles.
Web Browser Route: For some services, cancellation options are only available through their website. Log into your account on their site and look for subscription management options.
Navigating these common issues can help ensure that your attempt to cancel a subscription doesn’t end in frustration.
Considerations Before Cancelling
Before you wave goodbye to your subscription, take a moment to ponder a few things. It’s not just about cutting ties; it’s about knowing the aftermath.
Data and Content: Think about what’s at stake. Will you lose access to crucial data or treasured content? Make sure you back up or export anything important before you cancel.
Prorated Refunds: Hoping for some cash back? Check the subscription’s refund policy. Some services might offer prorated refunds, but many don’t. Know where you stand to avoid surprises.
Access Duration: Remember, canceling a subscription doesn’t immediately revoke access. You’ll typically retain access until the end of the current billing cycle. Plan your cancellation timing if you’re still using the service.
Reactivation Hurdles: If there’s a chance you’ll want to come back, understand the reactivation process. Will it be a breeze, or will you have to jump through hoops?
Special Offers and Grandfathered Rates: Leaving might mean saying goodbye to special pricing forever. If you’re on a legacy plan or snagged an unbeatable deal, weigh the pros and cons of leaving it behind.
Taking a moment to consider these factors can save you from regret and ensure you’re making an informed decision.
Absolutely, let’s explore some alternatives to completely cutting off your subscriptions.
Alternatives to Cancelling
Before you pull the plug, consider that there might be a middle ground. Sometimes, tweaking your subscription can offer a better solution than outright cancellation.
Subscription Modifications: Many services offer a variety of plans. You might be able to switch to a more affordable or feature-restricted version that better suits your needs.
Pause Your Subscription: Need a break but not ready to say goodbye? Some services allow you to pause your subscription for a set period. This can be a great way to save money without losing your account and data.
Negotiate Better Deals: Feeling bold? Reach out to customer service and see if there are any promotions or discounts you can take advantage of. You’d be surprised how often companies are willing to offer a deal to keep you around.
Explore Competing Services: If you’re not satisfied with the service or looking for a better price, shop around. There might be other services that offer what you need at a better value.
Share with Family or Friends: If the service allows multiple users, consider splitting the cost with family or friends. Services like family plans can make high-cost subscriptions more palatable.
Exploring these alternatives can provide a more flexible approach to managing your subscriptions, potentially saving you money while still retaining access to the services you enjoy.
Perfect, let’s address some frequently asked questions about canceling subscriptions on an iPhone.
FAQs
Q: What happens after I cancel a subscription on my iPhone?
A: Once you cancel, you won’t be billed for the next billing cycle, but you’ll still have access to the subscription until the end of the current period.Q: Can I get a refund after canceling a subscription?
A: Refunds depend on the subscription’s terms and conditions. Apple generally doesn’t offer refunds for unused portions of a subscription, but you can always contact Apple Support to discuss your situation.Q: How do I cancel a subscription if I don’t see it on my iPhone?
A: Ensure you’re signed in with the correct Apple ID. If it’s not there, you might have subscribed directly through the service provider, so check their website or contact their customer support.Q: Can I reactivate a subscription after canceling it?
A: Absolutely! You can resubscribe to any service you’ve canceled through the App Store or the service’s website, although you may be subject to current pricing.Q: What if I accidentally canceled a subscription?
A: No panic! You can usually resubscribe right away through the App Store or the service’s website. Just note that your subscription will likely renew at the current subscription rate.
These FAQs should help clear up common concerns and questions about managing subscriptions on your iPhone.
Conclusion
Navigating the world of subscriptions on your iPhone doesn’t have to feel like wandering through a labyrinth. Whether you’re looking to declutter your digital life, save some cash, or simply take a break from a service, knowing how to cancel subscriptions is key. Remember, it’s all about taking control of your digital footprint and ensuring that you’re only invested in services that add value to your life.
Regularly reviewing your subscriptions can prevent unwanted surprises on your bank statement and keep you in tune with what you’re truly using. And if you ever change your mind, most services welcome you back with open arms (and a quick tap on the ‘Subscribe’ button).
By following the steps and considerations outlined in this guide, you’ll be well-equipped to manage your iPhone subscriptions with confidence and ease.